
Written by Eric Gockel
If you’re getting started using Google Tag Manager, one of the first things you’ll probably want, or need, to do is add pixel tags to your website.
Whether you’re in marketing or on the tech side implementing, it can be not very clear if you’re not familiar with the GTM system, even if you have used Google Analytics.
Getting Started
Before you add tags, you’ll want to set up a variable for your Google Analytics ID so your GTM script can replace your existing Google Analytics tracking snippet.
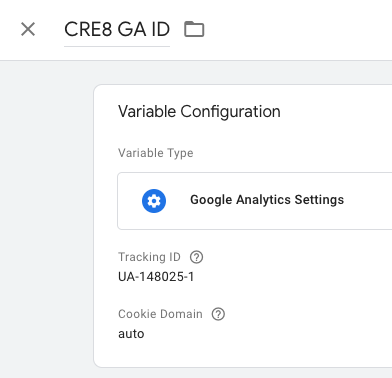
- Click New in User-Defined Variables
- Give your variable a clear name like “acmeCo GA ID.”
- Select Google Analytics Settings as the Variable Type
- Enter your Tracking ID (which can be found in your Google Analytics account)
- Click Save
- You’re ready to swap your Google Analytics script out with your new GTM script.
CAUTION: If you have a complex website configuration, you’ll want to thoroughly test first, possibly setting up a testing Property within Google Analytics before pushing to production.
Setting Up Facebook Pixel
You’ll need to go to Facebook Ads Manager, pop open the menu, and go to Measure & Report > Events Manager > Pixels. From there:
- Click Create a Pixel
- Give your pixel a name and a URL.
- The next screen, Install Pixel, makes it easy with GTM. Just select Connect a Partner Platform and choose Google Tag Manager.
- Connect your FB ad account with your Google Account
- Select which Account and Container you’d like to add the pixel to
- And that’s it! A Custom HTML tag will have been generated for you in your account’s container.
Setting up Twitter Pixel
Setting up the Twitter pixel is pretty straightforward as well.
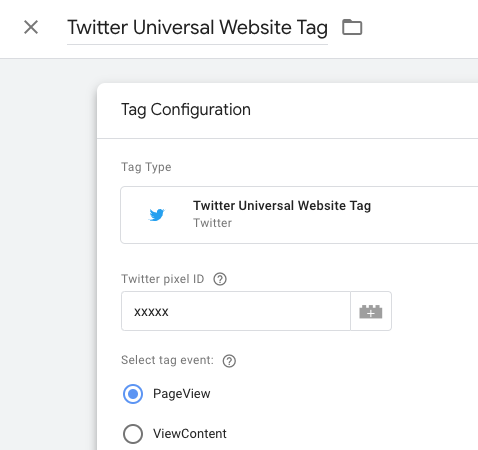
- Click New in the Tags section
- Select Twitter Universal Website Tag
- Grab your Twitter pixel ID from your Twitter Analytics site, More > Conversion Tracking. Click View code and installation instructions. You’ll see your ID buried in the line starting with “twq(‘init’, ‘xxxxx’);
- Set the tag event to PageView
- Set a Trigger on All Pages
Setting up LinkedIn Pixel
LinkedIn Insight tags are similar to Twitter:
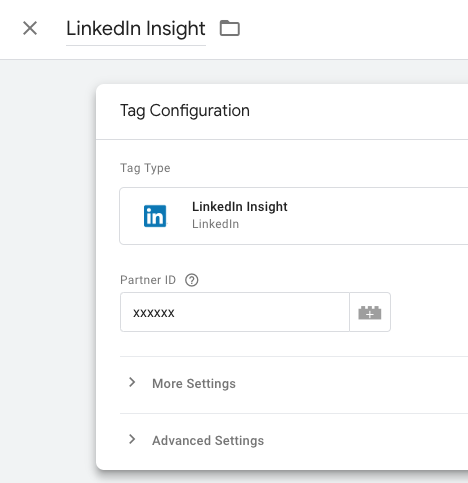
- Click New in the Tags section
- Select LinkedIn Insight as the Tag Type
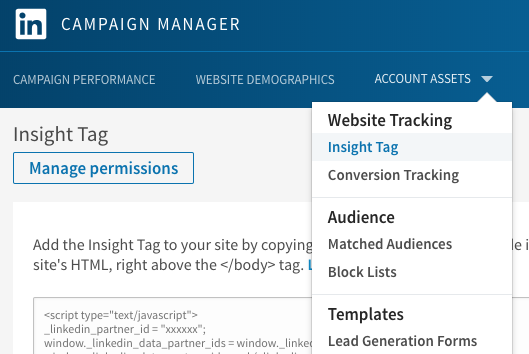
- Enter your Partner ID, which can be found in your LinkedIn advertising section Campaign Manager under Account Assets > Insight Tag, tucked into the second line of the script block at _linkedin_partner_id
- Set a Trigger on All Pages
Test and Submit
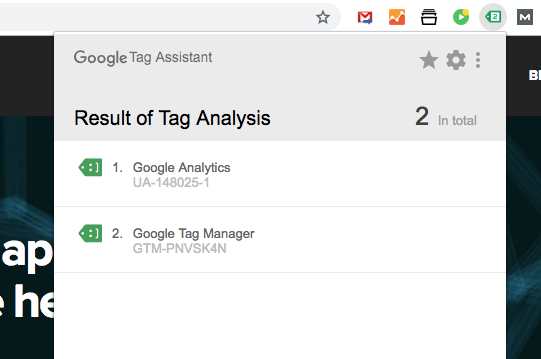
Once your tags have been entered and saved, you can switch to Preview mode. Next, you’ll need to download the Google Tag Assistant, which can help verify that your tags have been properly configured. Visit your site and click the Assistant icon in your browser to activate the testing panel.
Facebook has its Pixel Helper that can also be used to check your tags and quickly access your stats.
Questions? Let us know in the comments!